hen I was a kid, I played lots of card games. I was indoctrinated into the whole card game gig with 52-Pickup, then graduated to Go Fish. The older I got, the more card games I learned. There was one for every occasion: Playing alone? I had Solitaire. Playing with someone? Let me introduce you to my little friend Gin Rummy.
I spent hundreds of hours playing card games, but after a while they all seemed to blend together. I started feeling like each new game was just a variation of the last. For non-standard card games, there really wasn’t much to choose from. Uno was about it, maybe Skip-Bo. But even these were just regular card games in disguise.
Then, in the early 90’s, a game came along which changed everything. Instead of 52 cards, it had hundreds. Thousands. It simulated a wizard’s dual and was crack for geeks. If you have never heard of Magic the Gathering, stop everything, go to the nearest trash can, and deposit your nerd membership card; you have no right to carry it.
The first time I played it, I couldn’t help but think “you should have thought of this.” Seriously. With monsters and bolts of lightening and all sorts of magic spells, it was reminiscent of D&D, but with CARDS! How could I NOT have thought of this? Maybe me-from-the-future had come back in time to invent it. That made me feel better.
Building Your Own Card Game
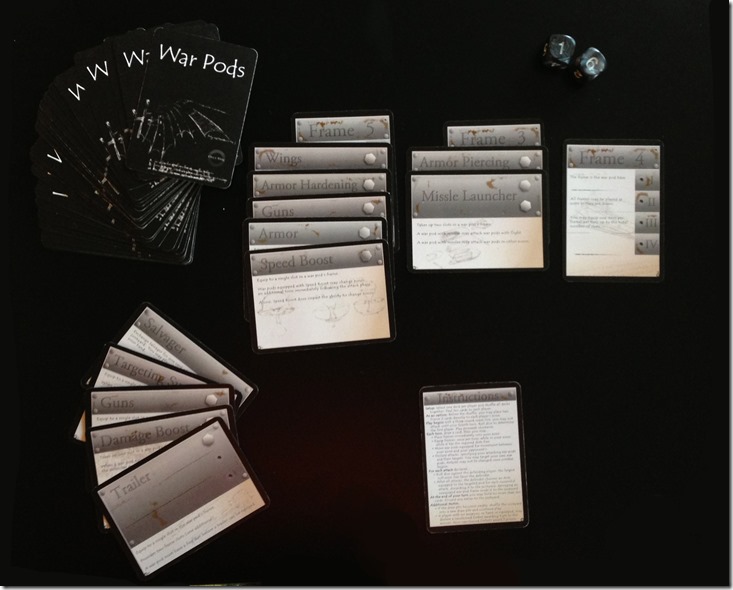
Playing a card game so different from the four-suited traditional games opened my mind to new possibilities. I’m sure I’m not alone in this. Ideas for card games began to present themselves and one in particular took root. Like most of my projects, it incubated for a few years before finally hatching into something I felt motivated to act on. I’m glad I did. As far as father-son projects go, this one was especially rewarding. Here’s a peek at what I ended up with:
I had never created a card game before, but it turned out to be relatively straightforward. I’ve captured the steps I took with a few tips so that others can learn from my experiences:
Step 1: Test It With Index Cards First
I had a general idea in mind for my game: a battle, where two or more players act as engineers, building war machines to attack the other players. I dropped less than two dollars on several hundred blank index cards and began building the decks as I originally envisioned them. Remember that these are throw away cards. Its easy to get caught up in the details, trying to make the cards resemble your vision, but resist this urge. Just write the name of the card or basic distinguishing information.
Then play the game. Do it several times, with as many people you can find. Adjust the rules, the card-to-deck ratios, and any distinguishing characteristics of your game based on these experiences. Remember that every deck shuffle is different, and just because you don’t draw the cards you expect one game doesn’t mean you won’t the next. Play it a lot to make sure you have a good sampling before you adjust the deck needlessly.
Step 2: Keep a Notebook
This is surprisingly important. During game play is when the most critical of feedback comes and, if you are participating in the game, it’s the least opportune time to capture. This is when the most impactful of playability issues, not apparent during your vision, will surface. Feedback and questions come up, like “Wings are too overpowered; there should be some way of counter them,” or “What happens if you equip both guns and missile launchers? Can you attack twice?” Make the time to write this stuff down. The questions are things that need clarification in the instructions; the feedback should be considered for the next iteration of your deck.
Step 3: Write Down Your Game Description and Directions
For your game, you probably have much of the description in your mind already. One of the first things I do with a project, even a personal one that I don’t expect to distribute, is imagine what the side of the box would say at the store. Write down just a blurb about what the project is. This is important, because it helps to set context for what the game is about and blends easily into the directions.
When you put together your directions, spell out the rules in detail. Also, consult your notebook. Include the rules you’ve settled on, but also try to include most of the questions that people have asked during testing. The goal is that someone should be able to play your game by only reading your directions.
Step 4: Select a Printing Company and Know Their Requirements
In today’s world of internet printing, its easy to find printing companies that specialize in cards. After researching these, I decided on www.MakePlayingCards.com. Primarily I choose this site because of their interface. I could upload my images, front and back, and see previews of the cards. They had specific instructions on the size of the card, the size of the margin, and the “bleed” area of the card image. They also had no minimum ordering quantity meaning I could make a deck and order just one copy if I chose.
Step 5: Make Your Images
Fire up your favorite image editor and let your imagination go wild. The card images are, of course, really important since they’re the primary thing your players will see. No matter if you scan in your own paintings, import photos, or draw all your images digitally from scratch, you’ll need image editing software. I choose to steal borrow images from scans of Leonardo da Vinci’s journals. I used Illustrator and Photoshop to make my final images, but Inkscape and Gimp are great, free alternatives to these. Be sure to save your original documents as well as the images themselves. I had to go back and regenerate the images multiple times.
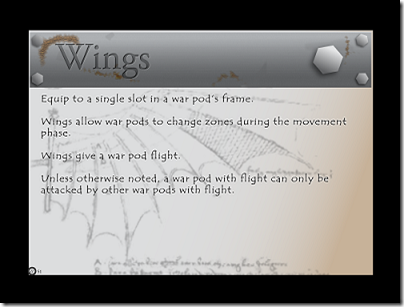
It also helps to keep things organized by numbering your output images. When you go to upload your pictures to the publishing site, you’ll need one image for each card, plus one more for the back of the cards (actually, I could have made a different back for each card, but chose to keep things simple). Also, remember the image specifications laid out by your chosen printing company. As you can see by the image of one of my finished cards, there’s an unexpected amount of boarder space that doesn’t appear on the final printed card:
For War Pods, I also chose to create an instruction card. For this, I drew directly from the text from step 3 above.
Step 6: Do a Trial Print Run and Test Again
Depending on the minimum ordering size of your printing company, I highly recommend ordering a few test packs. The original trials with index cards simply cannot compete with a real set of prototype decks. You’ll find a lot more people willing to beta test real cards that they can actually shuffle and deal. During this time, you may find yourself revisiting some of the rules that you previously thought locked in place.
For my project, a few weeks of play revealed this and more: a handful of typos on the card images which needed to be fixed before the final run, including one so obvious that I’m embarrassed it made it to print. If you look at the first image in this post, you can see it. My official position on the subject? I purposely misspelled “Missile Launcher” to underscore how important this step is.
Yeah. That’s what I did.


